<Trust>
  <Domains>localhost,jboss.com,jboss.org,redhat.com,amazonaws.com,salesforce.com,google.com</Domains>
</Trust>
Google Apps is another known business solution from Google. Google Apps supports SAML SSO in role of SAML SP, so you need to use your own application as SAML IDP. In this sample, we will again use idp-sig.war application from Picketlink quickstarts as IDP similarly like in this tutorial .
NOTE: Integration is working from Picketlink version 2.1.2.Final and newer
Google Apps setup
-
Creating Google Apps domain - you need to create Google Apps domain on http://www.google.com/apps. Follow the instructions on google page on how to do it.
-
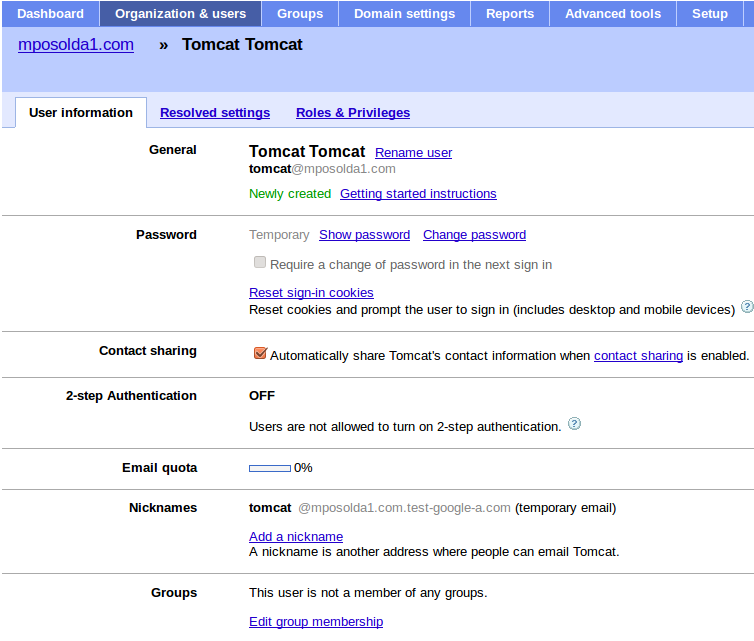
Add some users - let's add some users, which will be available to login into your domain. So let's add user tomcat first. In Google & Apps control panel, you need to click Organization & Users -> Create new user and add him email tomcat@yourdomain.com . This will ensure that nick of new user will be tomcat . See screenshot:
-
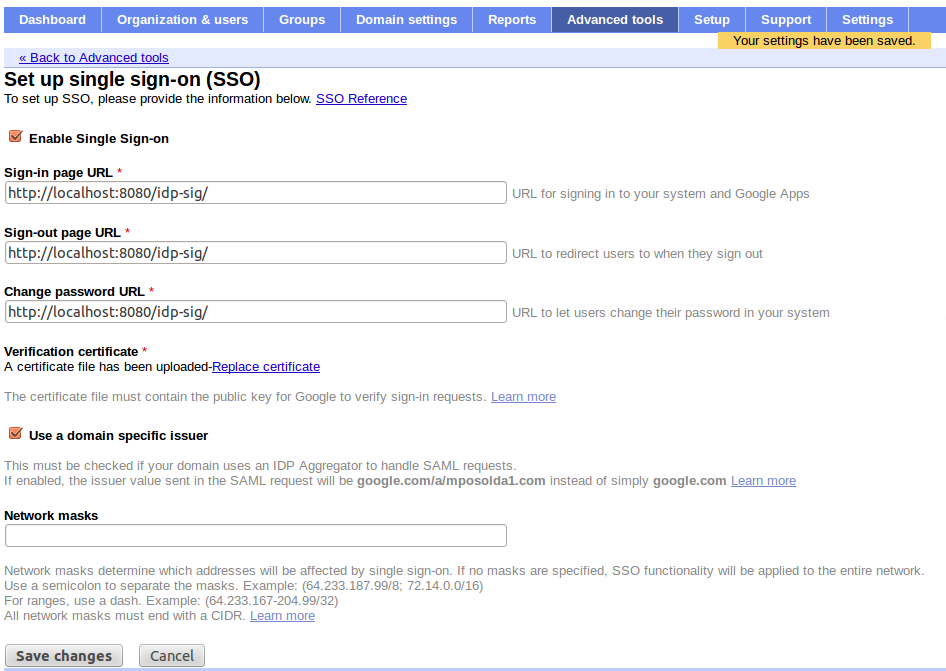
Configure SAML SSO - In menu Advanced tools -> Set up single sign-on (SSO) you can setup SSO settings. For our testing purposes, you can set it like done on screenshot . Especially it's important to set Sign-in page to http://localhost:8080/idp-sig/ . Sign-out page can be also set but Google Apps don't support SAML Single Logout profile, so this is only page where will be users redirected after logout. Let's click checkbox _Use a domain specific issuer to true.
-
Certificate upload - you also need to upload certificate exported from your picketlink keystore in similar way, like done for Salesforce in previous tutorials . So let's upload test-certificate.crt into Google Apps.
WARNING: Once again, you shouldn't use picketlink test keystore file jbid_test_keystore.jks in production environment. We use it here only for simplicity and for demonstration purposes.
Picketlink IDP configuration
-
Trusted domains configuration - update domains in idp-sig.war/WEB-INF/picketlink.xml
-
Metadata configuration - We don't want SAMLRequest from Google Apps to be validated, because it's not signed. So let's add another metadata for Google Apps, which will specify that SAMLRequest from Google Apps Service Provider won't be signed. So let's add another EntityMetadataDescriptor entry for your domain google.com/a/yourdomain.com into sp-metadata.xml file created in previous tutorial (you may need to create new metadata file from scratch if not followed previous tutorial). Important attribute is especially AuthnRequestsSigned, which specifies that SAMLRequest from Google Apps are not signed.
<md:EntitiesDescriptor xmlns="urn:oasis:names:tc:SAML:2.0:metadata"
                    xmlns:ds="http://www.w3.org/2000/09/xmldsig#"
                    xmlns:md="urn:oasis:names:tc:SAML:2.0:metadata">
  <md:EntityDescriptor xmlns:md="urn:oasis:names:tc:SAML:2.0:metadata" entityID="https://saml.salesforce.com" validUntil="2022-06-18T14:08:08.052Z">

......
  </md:EntityDescriptor>
   <md:EntityDescriptor xmlns:md="urn:oasis:names:tc:SAML:2.0:metadata" entityID="google.com/a/yourdomain.com" validUntil="2022-06-13T21:46:02.496Z">
      <md:SPSSODescriptor AuthnRequestsSigned="false" WantAssertionsSigned="true" protocolSupportEnumeration="urn:oasis:names:tc:SAML:2.0:protocol" />
   </md:EntityDescriptor>
</md:EntitiesDescriptor>
Test it
Now logout from Google Apps and start server. And now you can do visit https://mail.google.com/a/yourdomain.com . After that Google Apps will send SAMLRequest and redirects you to http://localhost:8080/idp-sig. Please note that Google Apps is using SAML HTTP Redirect binding, so you can see SAMLRequest in browser URL. Also note that SAMLRequest is not signed, but this is not a problem as we configured it in metadata that requests from Google Apps are not signed. So after login into IDP as user tomcat, you should be automatically logged into your Google Apps as user "tomcat" as well.